Buttons – History
♦ Back ♦ History ♦ Description ♦ Schematics ♦ Performance ♦ Pictures ♦
This project has a rather strange history. It sort of evolved from an early college-years project and if I were to start over, I’m sure it would be nothing like it is now. Anyway, it was already completely designed and half built by the time I came to terms with this, so I decided to finish it since I have nothing that I can use in its place.
I think it all started when I was originally reunited with my old Thomas Amplifier. In order to be able to get rid of my old transistor amplifier completely, I needed something that would allow me to select source inputs and route signals for multiple tape dubbing (I used to make a lot of cassettes at the time to listen to in the car or to give to others). I already had a BSR EQ-3000 graphic equalizer and ADC DD-4AX digital delay processing unit that could be used as a preamp (I didn’t know at the time that the ADC did not have gain greater than unity, and therefore could not drive the Thomas Amp to full output).
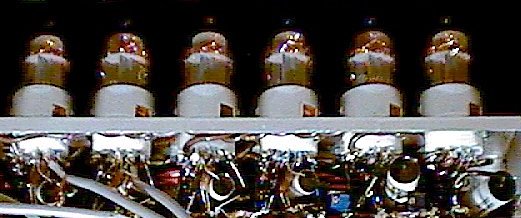
I didn’t really know where to start, but my father told me about some old Motorola 4000-series CMOS analog multiplexers that he had. He designed a simple circuit for me that I could use to implement what I needed. These multiplexers came in three configurations: single 8-channel (MC4051), dual 4-channel (MC4052), triple 2-channel (MC4053). I chose to use a pair of 8-channels for the source selection, one dual 4-channel for monitor selection and another for dubbing selection. I always ran out of source inputs, so having eight of them was very attractive. Since I didn’t want to deal with a dual power supply, I went with a single 12V supply and pulled the input signal up to 6V with a voltage divider, via a 1uF tantalum cap. There was also a 4.7k series resistor and diode protection for the somewhat frail, old 4000-series CMOS. After being routed by the multiplexers, the output was driven by a single-ended, generic transistor through a 10uF electrolytic capacitor. The design really wasn’t much different than your typical modern receiver, though cheap op-amps are usually used at the output stage.
The whole thing was controlled by a bunch of discrete latch circuits that were driven by momentary push-buttons through an encoder constructed of diodes. The reason I selected this method was so that the whole thing could be controlled via infrared remote. I never got around to implementing that, however.
As is usually the case with me, the big problem was the chassis work. I really hate chassis work, but that ends up being the most important part of the aesthetics of any component, since it’s what you have to look at every time you use it. The chassis itself was a couple of Radio Shack 8x6x2-inch steels chassis connected end-to-end (to become 16x6x2). It looked awful, but the plan was to mount a nice front panel where only the ends of the pushbuttons would protrude through since that was the only part I would see anyway. The problem was, how do I make the front panel? It would be nice if I could print it out on a laser printer and somehow attach it. Eventually, I chose to implement it by printing the face on the back of a clear overhead projector slide, ironing on some white “Monokote” (for model aircraft) to make the text show up and then mounting that to a piece of thin plywood with spray-on adhesive. I punched out the holes for the buttons in the overhead slide and the plywood beforehand, but didn’t punch the holes for the indicator LEDs through the overhead so that it would act as a window. Anyway, it didn’t look great, but it was tolerable. Eventually however, the toner delaminated from the overhead and the overhead peeled off. Oh well.
By this time I had transferred to another college away from home and the whole project was put in a box and abandoned. While at school, I listened to all my music through my PC and had no need (nor the room) for all that equipment. After getting married, I decided to try at it again, but this time I would do it right….
Goals
It’s always a good idea to set clear goals before starting on any big project. This project was designed to provide the following functionality:
Selector
- Select one of six stereo line-level audio sources: Phono (externally RIAA-preamplified), Tuner, CD, TV, VCR, or Aux.
- Select one of three stereo line-level inputs to monitor: Source (selected above), Tape 1, or Tape 2.
- Select one of three tape dubbing scenarios: both recording the Source, Tape 2 recording Tape 1 with Tape 1 recording the Source, or Tape 1 recording Tape 2 with Tape 2 recording the Source.
Equalization/Surround Sound
- Route the above selected Monitor input to external equalizers/decoders with sufficiently low output impedance to drive solid state equipment.
- Provide two pairs of stereo input channels from the equalizer/decoder equipment to a central volume control and preamplifier.
- Route the above selected Monitor input directly to the volume control and preamplifier, bypassing the equalizer/decoder equipment and driver.
Preamplification
- Provide amplification for a total of four channels with a gain of at least 10.
- Drive the channels with sufficiently low output impedance to drive solid state gear.
- Have good linearity, low noise, as much headroom as possible, and good overload characteristics.
Control
- All control requirements are to be handled by a single, reprogrammable microcontroller.
- The controller shall monitor the overall health (temperature, voltages, etc) of the unit and shutdown if necessary.
- Accept control input from the front panel and a future wireless interface (IR).
- Control the state of external devices, such as power amplifiers, using a simple, proprietary bus.