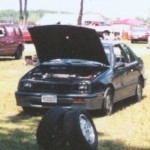
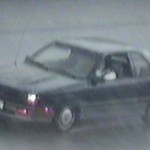
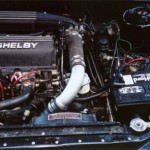
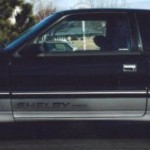
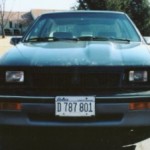
1987 Shelby CSX #694 of 750
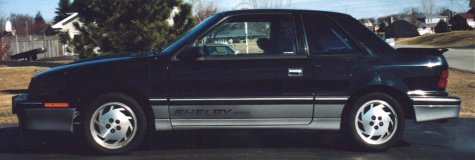
These pages are dedicated to the car I kept trying to get over the years, but could never find. If you read the page about the other cars I’ve owned, you know that I have owned three Chrysler P-bodies over the years, but could never find this car. That car, of course, is the 1987 Shelby CSX (Carroll Shelby eXperimental).
-
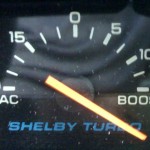
- 23psi of boost
-
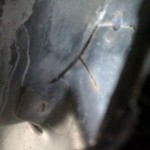
- Crack in the radiator core support
-
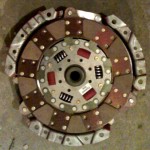
- McLeod ceramic/organic disc
-
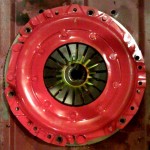
- McLeod ceramic/organic PP
-
- Dynomax Ultra Flo for a cat
-

- Twin SS 2.25″ tail pipes
-
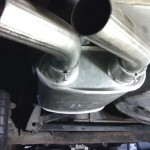
- Dynomax Super Turbo 3″ to dual 2.5″ muffer
-
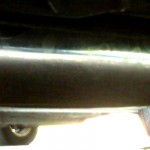
- 3″ FWD-Performance SS exhaust over the axle
-
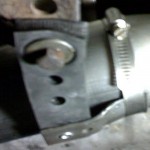
- Anti-sway strap clamp
-
- Anti-sway strap
-
- 3″ FWD-Performance SS exhaust
-
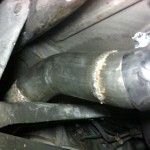
- 2.5″ down pipe to 3″ test pipe
-
- 7 year-old Dynomax Super Turbo muffer
-

- 7 year-old, aluminized 2.5″ JRB exhaust
-
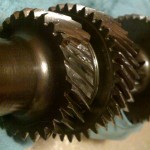
- What’s left of 2nd gear.
-
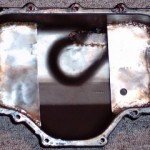
- Oil pan with baffles, reinforments, and a bung
-
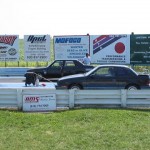
- Staging at Da Grove at SDAC14
-
- Staging at Da Grove at SDAC14
-
- Launching at Da Grove at SDAC14
-
- SDAC14 BBQ in Dave’s garage
-
- SDAC10 after MS
-
- Cooling down in the pits at Milan at SDAC10
-
- SDAC10 in the pits at Milan
-
- SDAC10 after MS
-
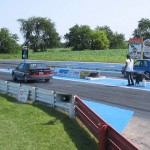
- SDAC10 at MS, crossing finish line
-

- SDAC10 MS raining through the in-course
-
- SDAC10 at MS, raining on the straight
-
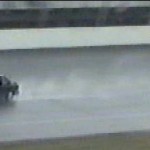
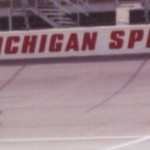
- In the rain at Michigan Speedway
-
- Passing the finish at MS
-
- Conquest IC Upper and Lower Hose
-
- Conquest IC Upper Hose
-
- Conquest IC lower hoses
-
- Conquest IC installed
-
- Conquest IC top mount
-
- Conquest IC new pipes
-
- Conquest IC without pipes
-
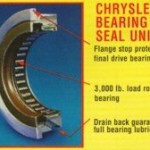
- Teckpak Fitzall Chrysler stabilizer bearing
-
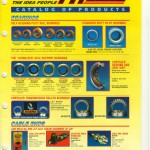
- Teckpak Fitzall catalog
-
- September 1999
-
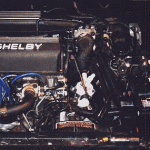
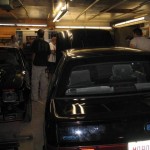
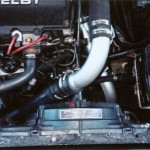
- Engine bay just after the rebuild in ’98
-
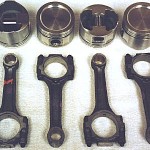
- New Venolias and TII rods
-
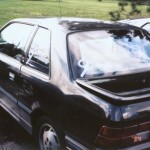
- Next day covered in dirt and hydraulic fluid
-
- Next day covered in dirt and hydraulic fluid
-
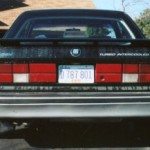
- Shot by the previous owner
-

- 1989 Shelby CSX Poster
-

- 1988 Shelby CSX Poster
-
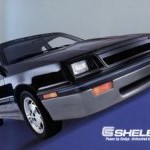
- 1987 Shelby CSX Poster
See more pictures from the gallery…
Power Steering Racks (Saginaw vs TRW Saga)
by Russ Knize on Dec.08, 2025, under Automotive, CSX
One particular part has always been a problem in the after market for these: power steering racks. Parts stores have always done a poor job of keeping track of the different types and their applications (Rock Auto is no exception). For the mid-late 80’s and early 90’s L and K-based stuff, this has been my understanding: there were two main manufacturers: Saginaw and TRW, each having a few variants (different turn ratios, valving, and stops). These are some that I personally know about for K-based cars:
- Saginaw
- 3.18 turns, standard feel
- 2.50 turns, firm feel
- TRW
- 3.25 turns, standard feel
- 2.50 turns, firm feel
- 2.06 turns, firm feel with larger turn radius to prevent wheels from hitting fenders
There are other variants as well (standard feel for larger wheels, L-body, etc). The key difference between the two manufacturers is the routing of the hydraulic lines between the rack and the pump: the fittings at the rack valve body are reversed and offset. So it is not straight-forward to switch between Saginaw and TRW racks unless you also change the lines (though the recent aftermarket situation seems to ignore this routing difference in some applications). If you intend to swap both the rack and the lines, then you can choose whichever is available. Note that this difference has no relation to the pump itself. Earlier models all came with Saginaw pumps (larger, tear-drop shaped metal reservoir), with later models (circa ’88) switching to ZF pumps (plastic reservoir, different tensioner). ZF pumps have their own, unique line set.
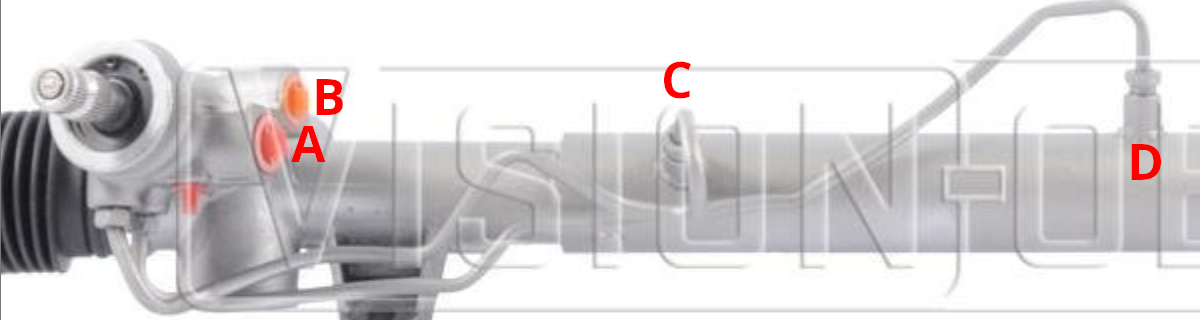
So how do you tell if you have a Saginaw or TRW rack? There are various ways mentioned on the Internet, but the best way I’ve found is to look at how the lines enter and exit the valve body and main body of the rack.
Saginaw racks have the upper pump line fitting (A) towards the front of the vehicle with the lower fitting (B) more towards the center of the valve body. The lines between the valve body and rack run parallel to each other (C and D).
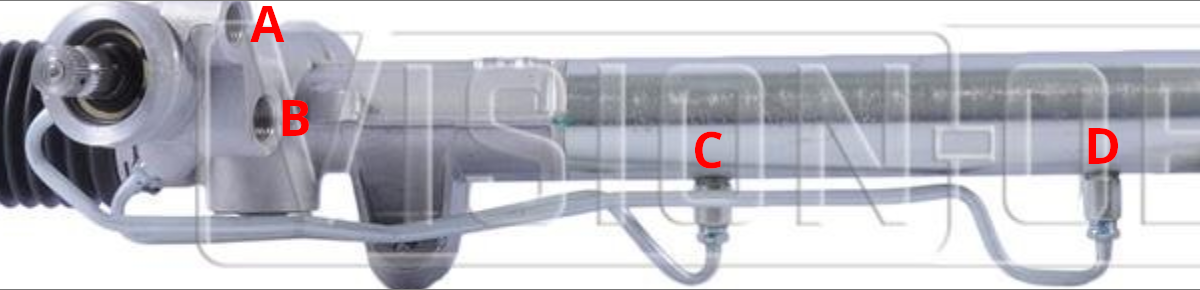
TRW racks have the lower pump line fitting (B) towards the front of the vehicle with the upper fitting (A) more to the center of the valve body. The lines from the valve body to the rack are not parallel, with the shorter line (C) on top and the longer line (D) facing more forward.
That brings us to the aftermarket. Information is becoming scarce and confusing and rebuilders often pay little attention to the various differences above. That said, I was able to uncover the following part numbers for Terrepower (now BBB Industries) racks:
- 102-0101: Saginaw, standard feel, 3.18 turns, for 14″ wheels
- 102-0102: TRW, standard feel, 3.25 turns, for 14″ wheels
- 102-0103: Saginaw, standard feel, 3.25 turns, L-body
- 102-0104: Saginaw, standard feel, 3.18 turns, L-body
- 102-0105: Saginaw, firm feel, 2.94 turns, L-body
- 102-0106: Saginaw, firm feel, 2.50 turns, 14″ wheels
- 102-0107: TRW, firm feel, 2.50 turns, 14″ wheels
- 102-0108: TRW, standard feel, 3 turns, minivan
- 102-0109: Saginaw, firm feel, 2.38 turns, L-body, 15″ wheels?
- 102-0110: TRW, firm feel, 2.06 turns, 15″wheels
Some models are available “new” rather than remanufactured, which have an “N” prepended to the part number (i.e. N102-0101). Whether these parts are still available is a different issue. As of this writing, the 0101 and 0102 variants are not difficult to find (both new and reman). However, the firm feel racks are harder to find and may be special order only (if at all).
An alternative to replacement are the rebuild kits, which are available for both Saginaw and TRW. These are universal across the subtypes. If the issue is mainly with leaking or sticking, a better route may be to clean and rebuild the rack rather than to take a risk on an expensive reman replacement of questionable quality. Reman racks are usually exactly that. I will likely go this route on the CSX.
Turbo Mopars and the Aftermarket
by Russ Knize on Nov.11, 2025, under Automotive, CSX
It is starting to become a little tricky to find certain parts for these cars and the overall quality has been in decline for a long time. While Chrysler’s parts-bin approach has been helpful to keep the unique part numbers for major components down, we are still talking about 30-40 year old cars at this point. The market is drying up, so it makes sense. I’ve been collecting various parts that I know I’ll need to get the CSX back into shape and I’ve noticed some things. I’ll keep updating this as I find new details, as it’s mostly for my own posterity anyway (the Internet of olde is dead). Let the parts hoarding commence!
Engine
Timing Belt Tensioners
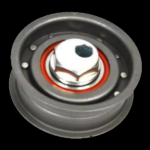
ITM 60114
These are still readily available for both the early and common blocks, but I have noticed that most manufacturers have moved to a plastic pully design. Most were either pictured as plastic or were pictured as steel but delivered as plastic (AC Delco). There is still the steel one from ITM (p/n 60114) for the early block and Enginetech (p/n TT192) for the common block, but it is the design with riveted halves that at one point had a reputation for coming apart. Perhaps these could be tack-welded together? Otherwise, we may have reached the point where we need to keep our old tensioners and try to replace the bearings….
Gaskets and Seals
Availability seems fine from most of the usual suspects (Victor Reinz, Fel-Pro). I don’t know if the quality has degraded any, but it generally wasn’t very good anyway. Timken seals are still available for certain applications, which were good back in the day. They look the same to me.
Cooling System
Radiators
There seems to be a manufacturer still making a full-size radiator for these (part number usually ends with “980”). No distinction is made between turbo and non-turbo, but a modern aluminum core likely outperforms the old designs anyway. It is of aluminum/plastic construction, so it would be wise to move away from green coolant over to something more modern. A full flush and change over to a yellow or orange antifreeze (extended-life, Dex-cool, HOAT, etc) is wise to preserve the condition of an aluminum radiator.
Heater Bypass Valves
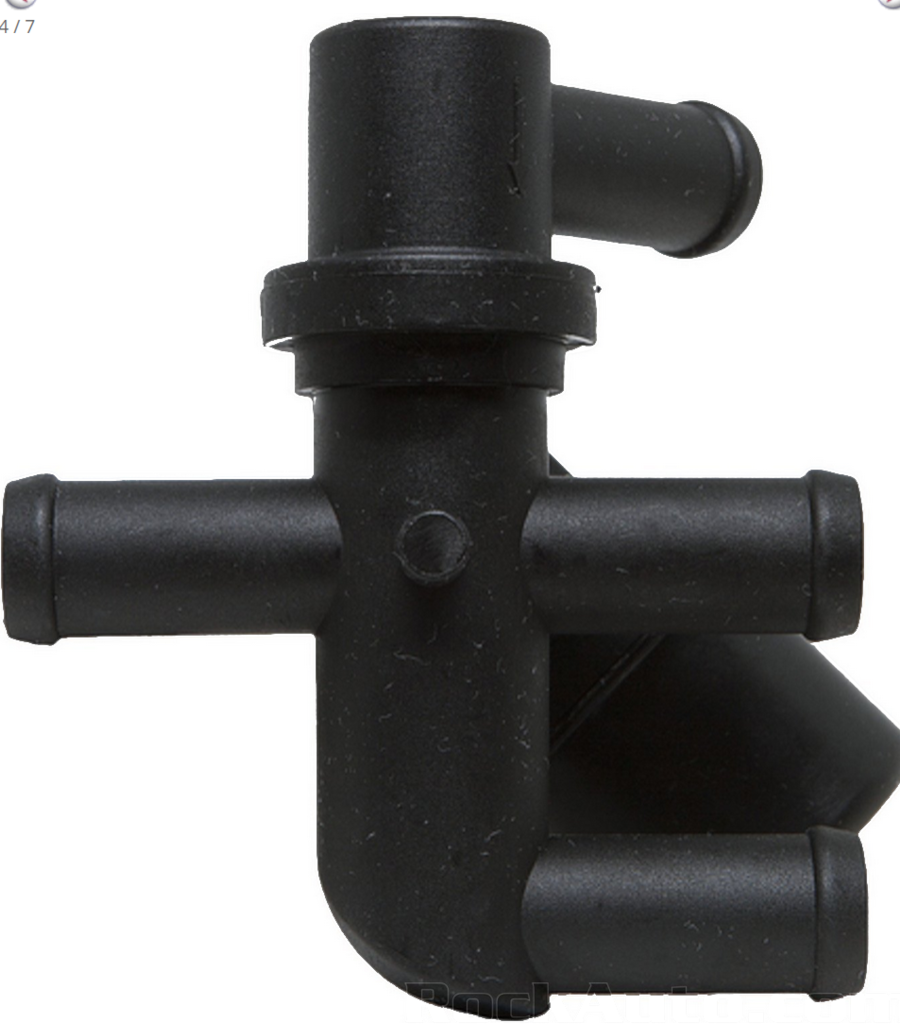
Later 3×1 arrangement with angled barb.
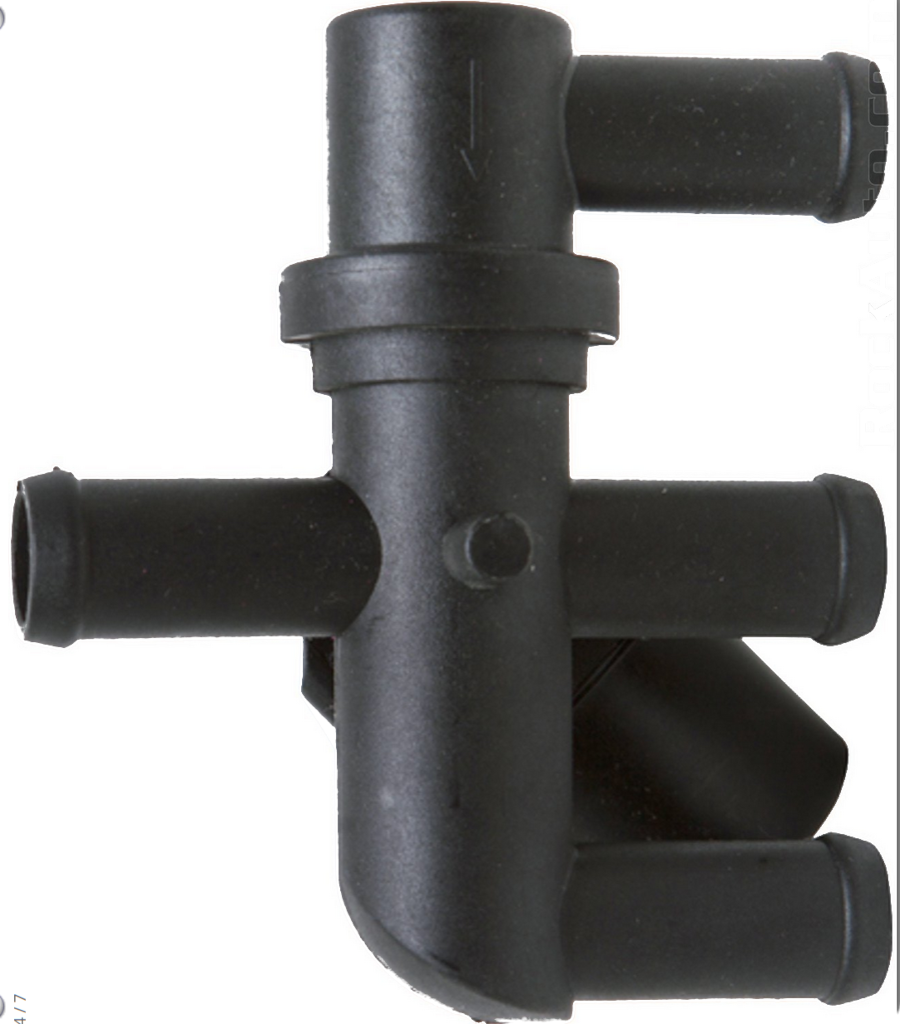
Later “3×1” arrangement.
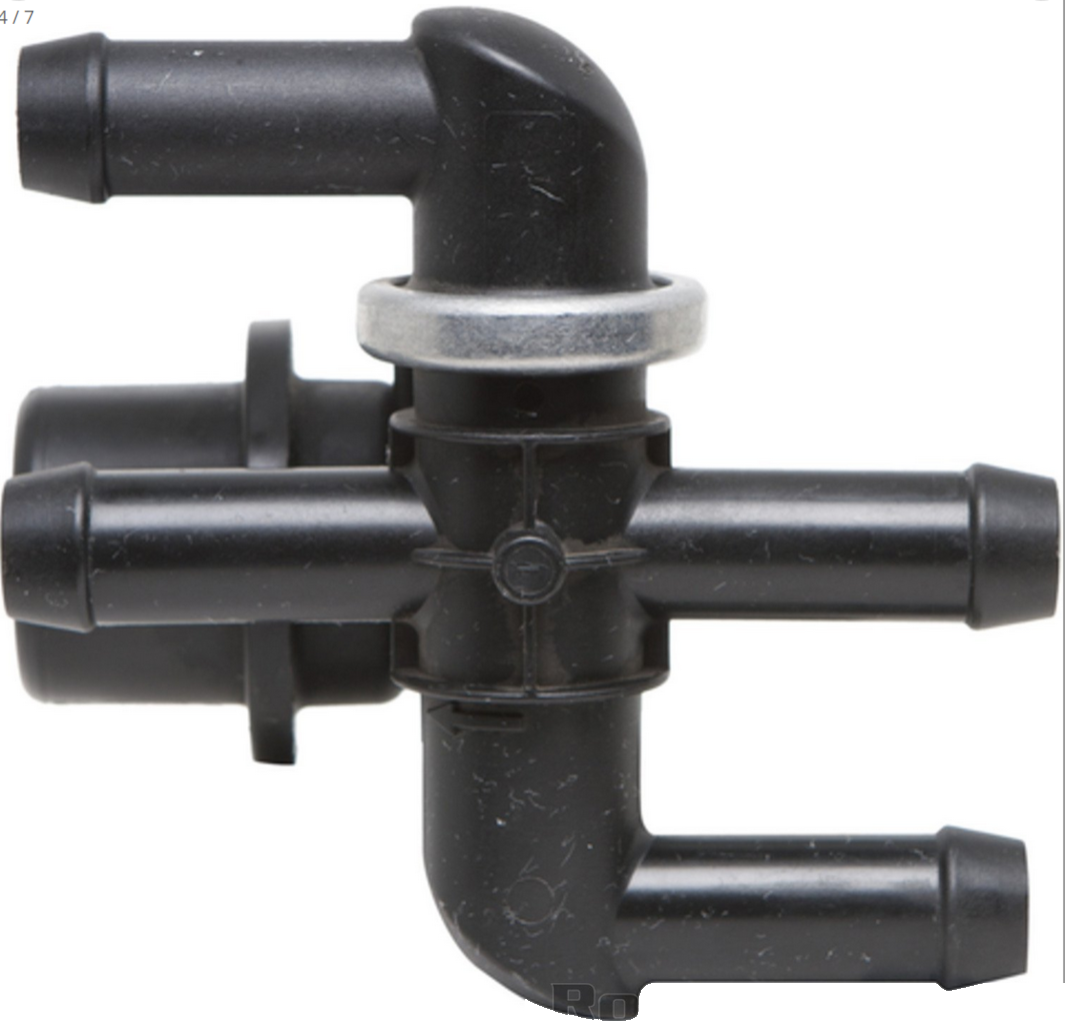
Early “2×2” arrangement.
I did notice that a number of listings for heater bypass valves are not correct. There are 3 versions of the same valve, with the only difference being the direction of the top barb. They all seem to be made by the same factory now, as the version with the crimped steel ring is being superseded by the glued version. I refer to different types as:
- 2×2 – used on early “suck-through” turbo setups when the valve is located under the airbox right next to the head.
- 3×1 – used on later “blow-through” turbo setups, sometimes including intercooled depending on the mounting location. These are usually located in the area in front of the trans or under the battery tray.
- 3×1-angled – used on non-turbo and some later turbo setups. Sometimes needed when the cruise control is located under the battery and/or when there is an intercooler and/or some custom setup.
Just look closely at the one you are replacing. For the 2×2, look at ’86 2.2L Turbo. For the 3×1, look at ’88 or ’89 2.2L Turbo II. For the angled version, I found it listed under 1990 turbo models.
Thermostat Housings
The OEM housings like to rust, but new ones were always available for a few bucks. Despite what some of the pictures show, most of the current ones (including Four Seasons) seem to deprecate down to a poorly cast iron/steel housing. It should last, but it doesn’t look right. If you want the stock look, I found that GPD p/n 8241385 arrived as the stamped one. Otherwise look to the billet aluminum housings from FWD Performance, etc.
Hoses
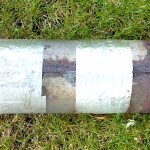
I was pleasantly surprised to see that coolant hoses all seem to be readily available for most setups from known-good brands like Gates and Continental. This includes the short lower radiator hose for intercooled engines (non-L-body) and a number of the custom-molded heater core lines. Some of the listings are wrong, so just look closely at what you have and check nearby models and model years if you don’t see the one that you need.
Chassis
Brakes
For typical stock stuff, parts are still readily available from reputable manufacturers (Raybestos, Dynamic Friction, etc). Most models had rear drums well into the 90s and those parts are easy to find. The later ’89+ rear disc brake setups also have reasonable parts availability, as these were used again on some later models.
The early ’87-’88 solid rear disc brake setup (Shelby and certain Daytonas) was unique, but appears to still have some parts availability. I do see some closeouts happening from a few vendors, but pads, rotors, and hardware are still available even as performance options are dwindling. Rear calipers have not been available for a long time. Rebuild kits are still out there, but replacement phenolic pistons are not. I noticed that the unique parking brake cable is also now discontinued.
Power Steering
Steering Racks
There were two OEM power steering rack manufacturers that were slightly incompatible with each other (Saginaw and TRW), each with a bunch of sub-variants. The reman market has always been a bit of a mess about this, which made it difficult to get an exact replacement rack for certain applications. This topic is a a rabbit hole, so I made a separate post about power steering racks and how to identify them.
Pumps and Lines
Remanufactured and new Saginaw and ZX pumps are still available. While separate line sets are still available for the two types of pumps, I did notice that there is often no distinction between Saginaw and TRW racks. Sometimes separate return lines are shown, but sometimes not. The two rack manufacturers had two different arrangements for the line fittings, but the fittings themselves are the same (M18x1.5 inlet, M16x1.5 return). The only difference between the lines were a few bends and the retaining bracket, so it should be possible to use what is available with some mounting modifications.
Return of the CSX?
by Russ Knize on Sep.12, 2025, under Automotive, CSX

 The CSX, which has been slumbering in the garage for the past dozen or so years, was slowly entombed in boxes of stuff and donations and whatnot. I recently cleaned most of that out with the goal of getting the CSX up and running again. It needs body work and while I have everything I need to fix it, I intend to just bite the bullet and pay a shop to finish it properly for me. Despite my best efforts on Frankentona, I know I lack the skills and facilities to do a proper paint job in my garage. I’m not looking for a concourse finish, just something durable that looks roughly stock and will polish up nice.
 The motor is a bit of a hodge-podge right now. I threw this car back together with whatever I had lying around about 12 years ago, as we had sold our house unexpectedly quickly and I had to clear out and pack the garage. I don’t remember what head is on it, what turbo, what cal, what injectors, what clutch, etc. I do I know the trans is an A555 with an OBX and the axles are Diriveshaft Shop. I kept the motor and trans from the Daytona before I sold it, so I will definitely be using the bottom end from that.
Anyway, I swapped out the decade-old gasoline from the tank, put a new battery in it and it fired right up. No drama.
Life Off of Jack Stands
by Russ Knize on Aug.18, 2014, under CSX
The CSX has been up on jack stands for about 8 years. Life has a way of rearranging priorities. However, I was either going to cobble it back together or haul it off on a trailer. Either way, it had to move. I aborted all upgrade plans, slapped my only spare working head and turbo on there and drove it. It still burns oil, so at least I know that the bottom end is truly done. Poor thing. Some day, I hope to give it the attention it deserves….
The CSX: April 6, 2008
by Russ Knize on Apr.06, 2008, under CSX
Well it’s been about a year and a half since I drove the car. This weekend I finally got a chance to tear into it. I pulled the head and tore it completely down. This crappy reman head is pretty screwed-up. The three rear coolant jackets have been ground out and rewelded at some point. There is a small crack between one of the forward jackets and the chamber. The cam journals are pretty chewed-up too, so I think this head is done. Too bad too because it has tight guides and fairly new valves. The plan is to use the original head that came off this car when I got it back in 1998, which appears to have been junkyard TBI roller cam head as the exhaust valves are pretty burnt up. It also has some small cracks starting in the rear jackets, but they are not threatening yet and can be relieved. The guides are worn as well and so it needs a complete rebuild….
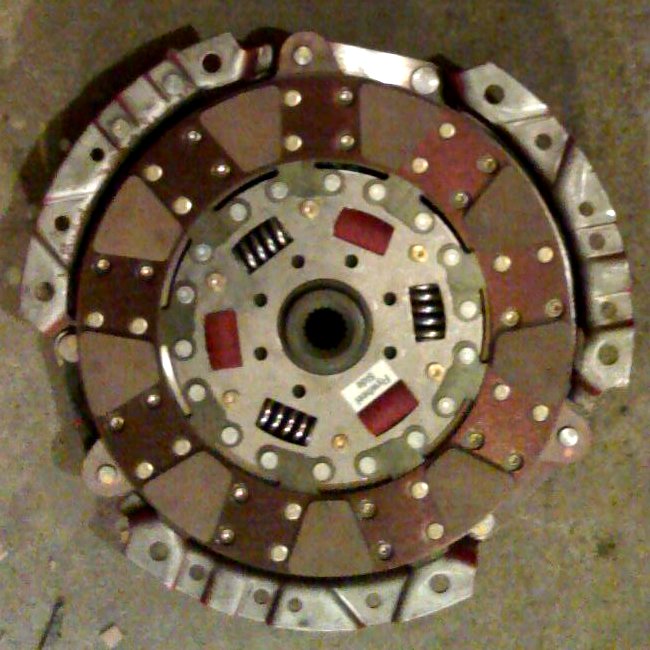
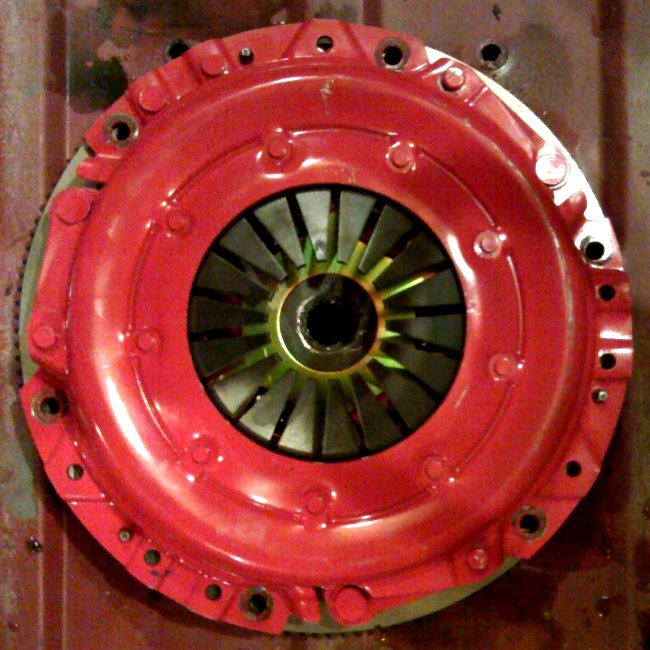
I also pulled the trans in preparation for the new TU ceramic/organic clutch that’s been sitting on a shelf waiting for a chance to be installed. I also checked the input shaft and diff carrier play and they seem to be holding up well. I had a little trouble removing the passenger side axle due to the OBX’s tendency to collapse slightly when the bearings are installed. A bit of tapping persuaded it out.
Back to the head…a month or so ago I decided to use this head as my first attempt at head porting. I figured it was no big loss if I ruined it and was still usable if I didn’t. It turned out much better than I thought it would. I made a few mistakes, but it should still flow much better than stock so I figure why not try to run it and see how it does.
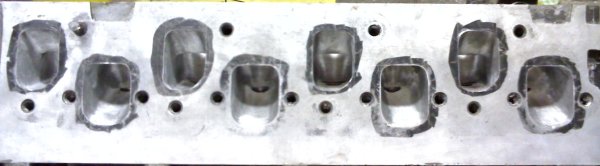
Intake, before and after (click for higher resolution):
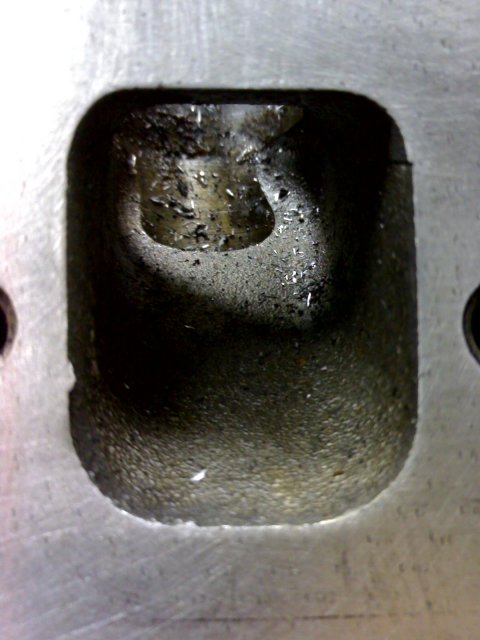
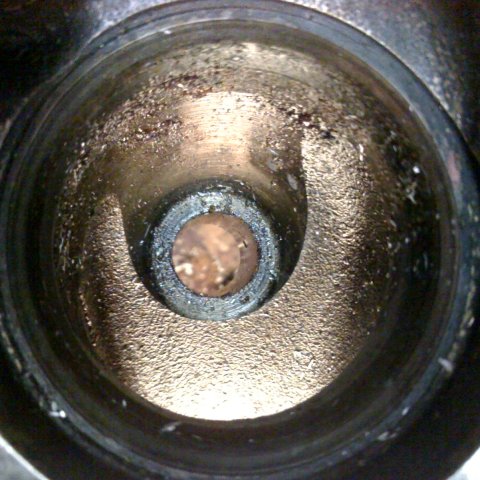
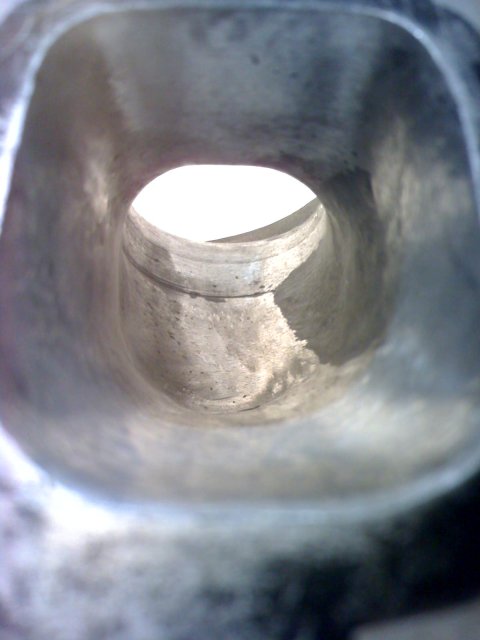
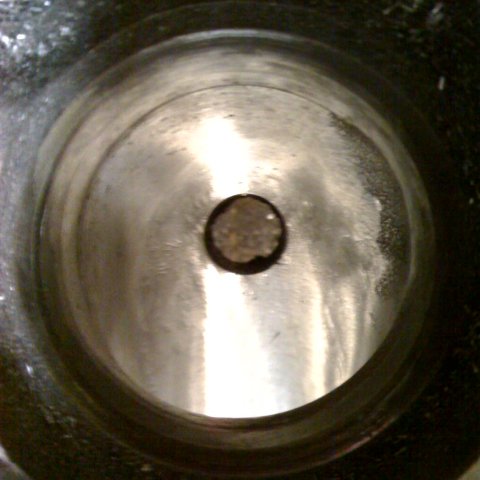
Exhaust, before and after (click for higher resolution):


The bowls were cleaned up and the ports straightened and blended. The roof of the intake was raised considerably (too much over near the bowls) and the roof of the exhaust was also raised slightly (there is a coolant passage that needs to be watched out for). I also filled the area on one side of the intake ports where core drift always leaves a pocket the undercuts the seat with JB Weld. This is probably where Steve Menegon does it, but I didn’t look that closely at his head on the Daytona before installing it. The floors were smoothed and blended, but otherwise left alone. I did lay back the floor at the exhaust bowl more on the advice from Tyler. I’m now coming up with a way to de-shroud the valves so that it is done equally.
The CSX: June 5, 2007
by Russ Knize on Jun.05, 2007, under CSX
I literally have not touched this car, short of starting it up once this spring. I really need to tackle the mechanical issues first, just so that it can be driven in the event of an issue with the Daytona. With the birth of our son this past December, there just hasn’t been any time. What little spare time I do have gets devoted to fixing small issues on the Daytona. I suspect that I will not be able to do anything with this car this year.
The CSX: November 3, 2006
by Russ Knize on Nov.03, 2006, under CSX
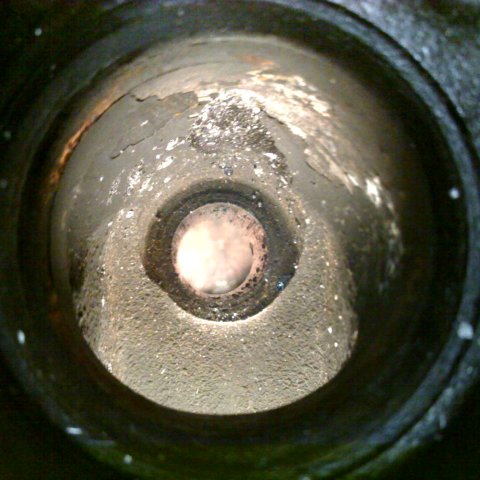
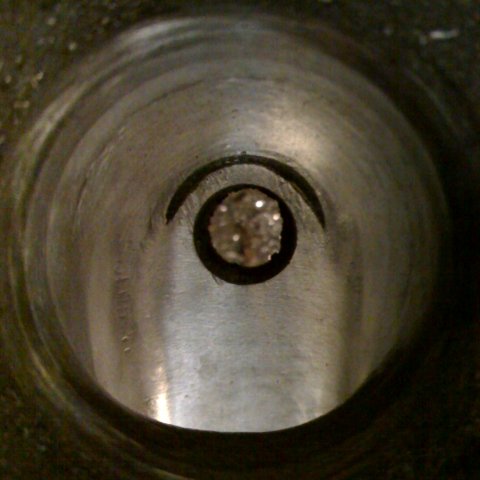
Well, on the way home from work I noticed that I had no heat and the temp guage was acting weird. I was like great, it’s the frickin’ head gasket that’s making it smoke. I started filling the radiator, which was pretty much empty, and heard a splashing noise. I look under the car and coolant is dumping out from behind the block. Dang core plug popped out again. Man I hate that thing. There is no room for the CSX in the garage, so I forged ahead with the Daytona. The CSX needs the front struts swapped, the turbo swapped, the clutch swapped, the radiator core support welded, the K-frame checked for square, the ball joints re-replaced, and a full, 4-wheel alignment job. Poor car needs a break.
The CSX: October 9, 2006
by Russ Knize on Oct.09, 2006, under CSX
 Turns out that I didn’t tighten the distributer enough. The front engine harness is tied to the corner and it slowly pulled more and more retard until it was way off the scale and ran like crap. I also experimented with some different cam settings. It’s currently set to 2 degrees retarded on the 88 TBI cam. It’s a little soggy on the bottom end, but pulls pretty good to the redline. It’s just a matter of switching my driving habits a bit.
The kevlar clutch for the Daytona arrived, which is now swapped and the pressure plate (LUK unit painted red) for the TU ceramic/organic is now freed up and standing by for the CSX. At some point after the Daytona is done, I am going to have to swap the clutch and the turbo.
The CSX: September 28, 2006
by Russ Knize on Sep.28, 2006, under CSX
Went to an SDAC Chicagoland drag racing event at Great Lakes Dragway in Union Grove, WI on the 26th. I was hoping to get into the 14s again and hopefully set a new record for myself, but it wasn’t to be. My best time was a 15.8 at around 92mph. With the extra traction, the T2/T3 clutch just wouldn’t hold during my launches. I tried a couple of techniques, but I smoked it BAD every time. The track was very busy, so we only got about 4 runs in. It just so happens that the TU ceramic/organic clutch that I got for the Daytona has the wrong shaft size. The plan now is to put a better, longer-lasting clutch into the Daytona and put this clutch into the CSX. I think it will be perfect for the job.
On the bright side, JT loaned me a MSD Blaster 2 ignition coil to see if it would clear up the 5000 RPM miss I was having. It did. The car pulls to the redline awesome now. In fact, I hit the rev limiter a few times because I am so used to having the missfire cue me to shift. Going to try to gap the plugs up to stock to see if the fire stays lit.
The CSX: September 19, 2006
by Russ Knize on Sep.19, 2006, under CSX
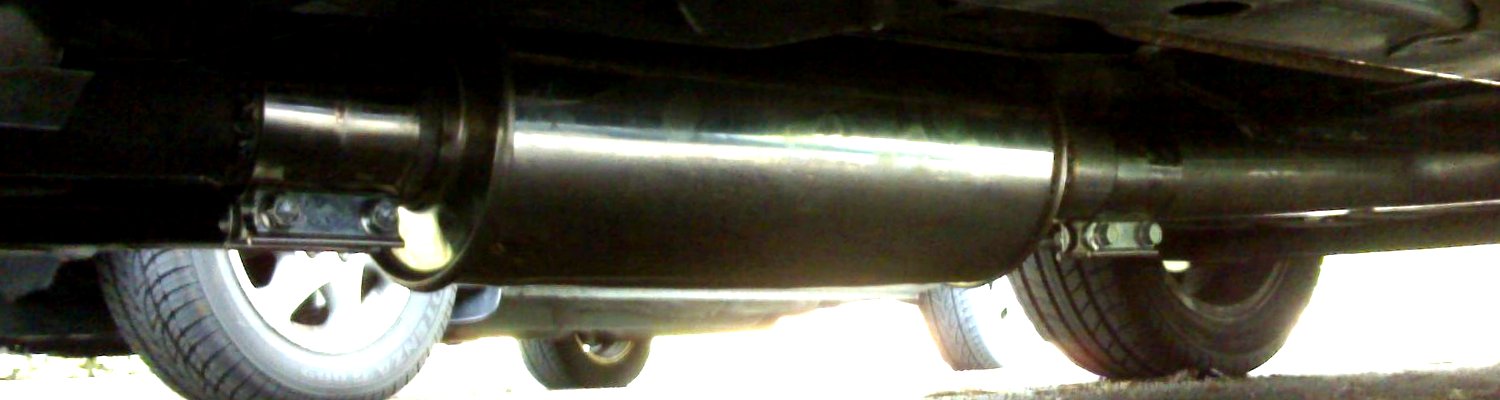
That setup was way too loud. There was a deafening drone throughout the band. The only quiet spot was between 2000 and 2500 RPM. I went ahead and replaced the test pipe in the cat’s position with the Dynomax Ultra Flo (p/n 17296). That cut the drone by about 50% overall while driving and it idles pretty quiet now. It’s louder than I’d like, but I can live with it. It’s now very quiet in that 2000-2500 range. I’m betting installing the cat instead of the Ultra Flo will make it even quieter.
I also replaced the hatch struts, finally. NAPA sells the “StrongArm” brand of struts that makes the correct one for P-bodies with a spoiler.