Automotive
The Daytona: December 03, 2003
by Russ Knize on Dec.03, 2003, under Daytona
The floorpans are painted. I got stalled over the weekend because I ran out of paint. I had ordered more the previous week, but it was delayed until yesterday due to the holiday. I also painted the area under the rear passenger seat, which was fairly rusty around the rear seat belts and in the bowls. It looks like it rusted from the inside and I’m not sure where the water came from. The rear quarter panel windows are the most likely candidate. I still have to replace the center section of the passenger side front seat crossmember, which had to be removed to replace the rusted metal underneith. Once that is done, I can finally reassemble.
I am seriously considering upgrading the interior to the 1991+ style. I have a line on a mostly-complete black interior from a ’91, plus a pair of doors. Supposedly, the new interior will mount to the old body. The exceptions are the door panels and the center console (and the wiring, of course). Since I would get the new doors, that is not a problem. Some fabrication will probably be needed for the center console, though. The other part I’m not sure about is the steering column. I’d like to keep the one I have, so hopefully that will work. I have not run across anyone who has really done this before, so it should be interesting. In the interest of time, I may have to delay this until the spring though or perhaps do a partial conversion. It would be a shame to put all the old stuff back in just to rip it all out again, but I am pushing my luck with the weather as it is.
The CSX: November 30, 2003
by Russ Knize on Nov.30, 2003, under CSX
The original fuel pump croaked a couple of weeks ago. Since this is my only running car, I had to fix it ASAP. I ordered a new Walbro 190lbs/hr fuel pump from FWD Performance, but couldn’t afford to wait for it to show up. So, I dropped the tank and yanked the pump from the Daytona (same 190 unit, only 1 year old) and put it in the CSX. Seems to be working fine. I replaced the shifter cable bushings with the polyurethane “Booger Bushings”, since the originals under the hood were long gone. I also changed the oil, which was way overdue, swapped out the air filter, and gave everything a good looking over. There are coolant leaks from just about everywhere one can have a coolant leak. They are all slow, but add up to a quart or two of coolant every couple of weeks. The freeze plug next to the one that blew before is starting to seep. I REALLY need to swap this motor out soon. It is on borrowed time. The new cal is rocking along and gets better mileage than the ND unit did. It’s still lower than my Shadow was, but the CSX has smaller series tires and the short gears on the tranny.
The Daytona: November 26, 2003
by Russ Knize on Nov.26, 2003, under Daytona
 Well, all the pans are in, the holes are patched, and the surfaces prepped for final paint. The surface is rusty from the acidic etching solution used for POR-15 (“Metal Ready”). If the weather holds, I will finally paint the thing this weekend. I will be very happy when this is done so that I can start putting the car back together. There is a fair amount of mechanical stuff to do along the way, but I don’t have to worry so much about the temperature with that. I just want to have it back on the road before the first serious snowfall so that the CSX can be put back into the garage.
On that note, I have collected a nice array of parts for it. I have the rear axle assembly, front springs, knuckles and calipers, master cylinder, and proportioning valve from a 1989 Daytona Shelby. The should handle awesome once everything is aboard, though I doubt I will have time for that this year. I have stainless steel braided brake lines, Koni struts and shocks, and polyurethane control arm bushings as well. I hope to have the struts, shocks, and bushings in this year yet, since I have it all apart anyway. I’d be a shame not to upgrade the brakes too, but I am missing various bolts and bits and I don’t want to get stalled. I guess we’ll just see how it goes.
The Daytona: November 24, 2003
by Russ Knize on Nov.24, 2003, under Daytona
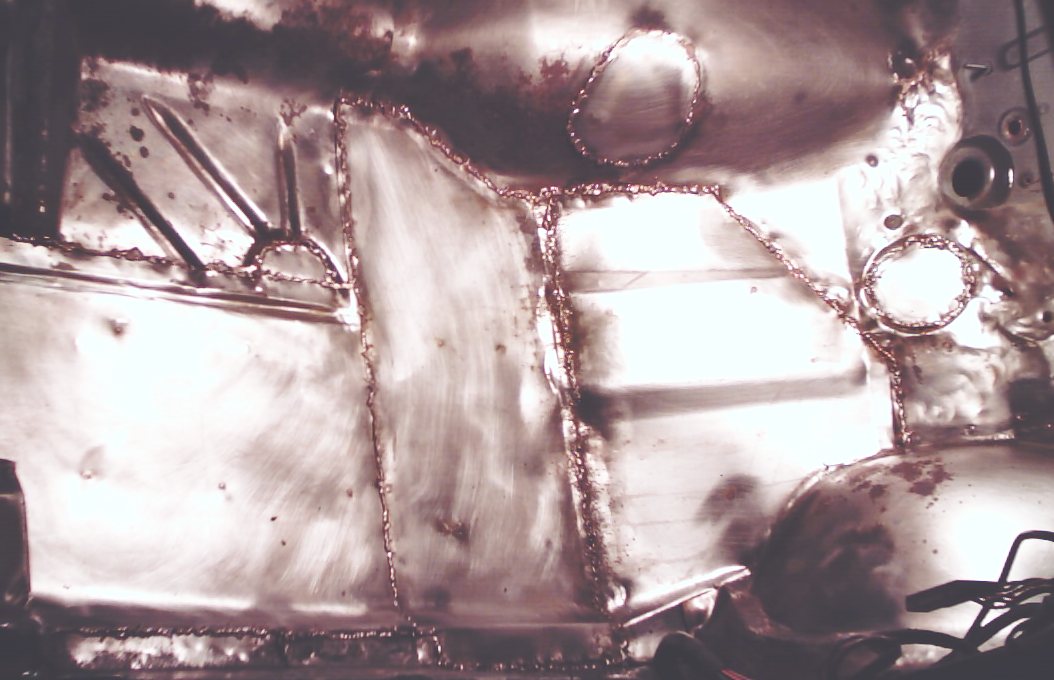
 Got the driver’s side welded in. I didn’t do quite as nice a job forming this sheet. I sort of got it close, tacked it in and beat the crap out of it with a large sledge hammer to form the front of it to the weird shape of the floor pan around there. I also did not try to reproduce the channels like I did on the passenger side. I did kink a couple of diagonal dents with a cold chisel and hammer on the right portion to keep the panel from wobbling.
The Daytona: November 17, 2003
by Russ Knize on Nov.17, 2003, under Daytona
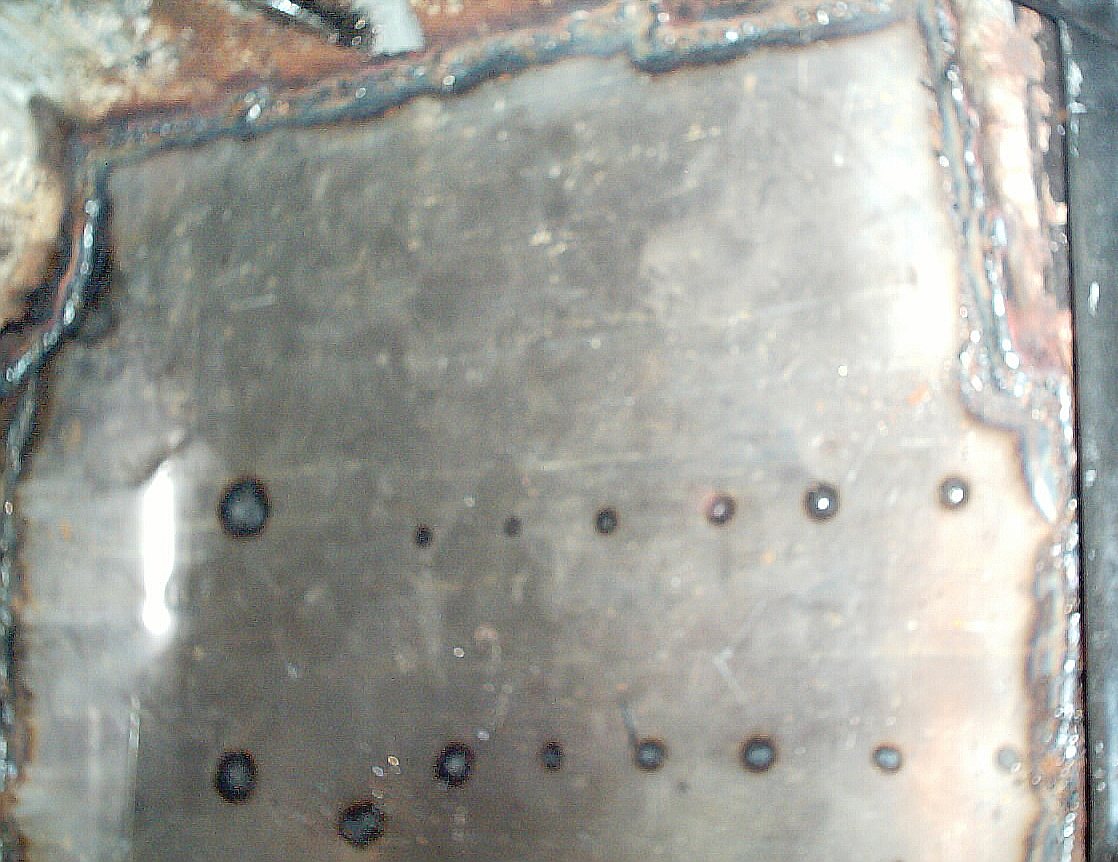
 Progress has been slow but steady on the floorpans. The passenger side is welded back in. I ended up getting a MIG welder, as it is the only way to do sheet metal (short of TIG). It definately makes the job much easier and better-looking than trying to do it with a stick welder (less cleanup). I did get one of those stitch welders off of eBay for $20. For stick welding small stuff, it really does help. The rod doesn’t stick to the piece and you don’t have to worry so much about burn-though. Before welding the plates in, I painted the frame rail and the bottom of the plates with POR-15 Chassiscote Semigloss Black. I have had good luck with POR-15 in the past, but this will be the real test. Obviously, I had to take a wire wheel to the places that I welded the plates to the frame because the paint was burned away. I will go back and touch those up. Also, I won’t be using the semigloss stuff again. The finish is very random with using a brush to apply it. Spraying it probably works better.
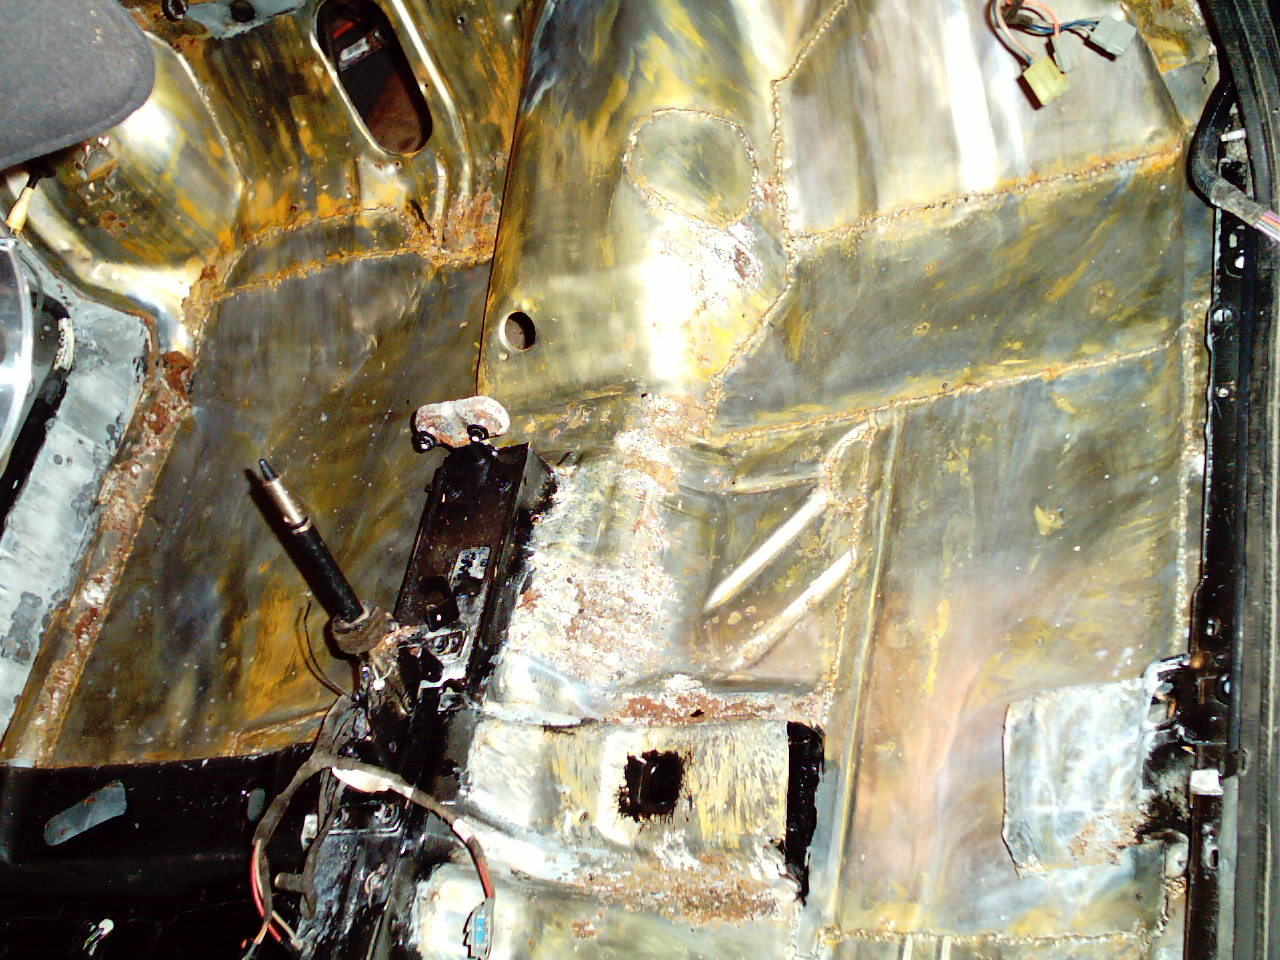
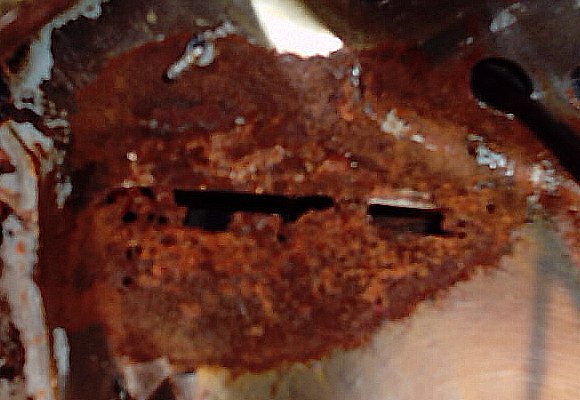
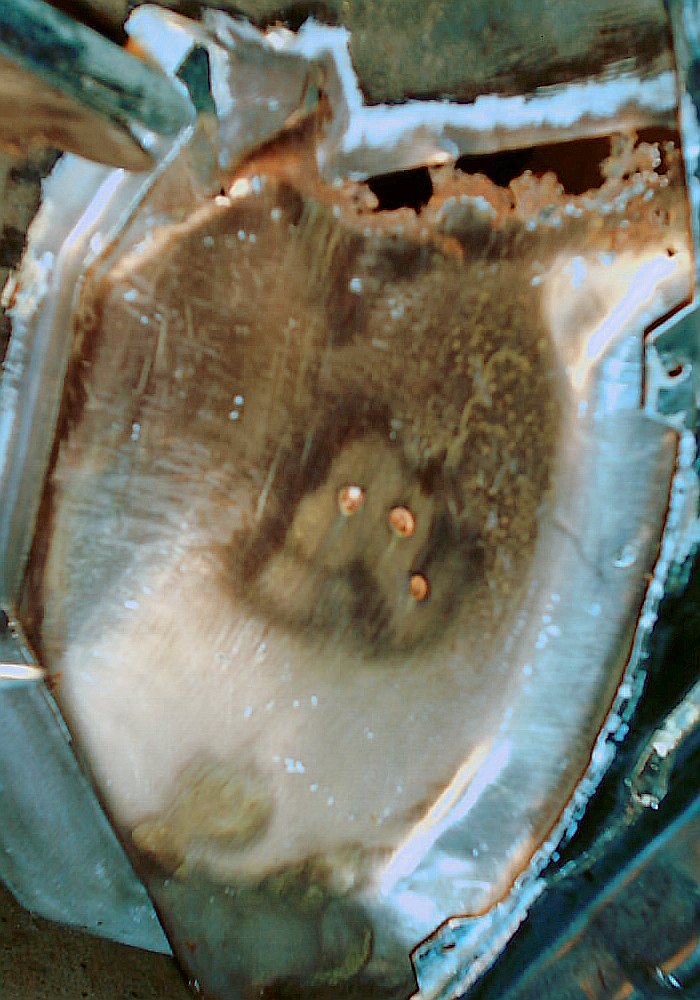
 The driver’s side is out and the paint stripped. I was disappointed to find the rear K-frame mount on that side is bent as well. This one is bent down instead of up. Even so, I was unable to straighten it. I may give it one more shot with brute force (dropping the car on a jack stand) before welding, though. That’s the only way I’ve ever been able to straighten heavy gauge frame rail steel in the past. Also, the driver’s side fender is rusted out pretty bad at the top where it meets the firewall. This area is prone to rust on these cars if it has ever been in an accident. The body caulk cracks and then water, salt and debris gets packed into the seam by the wheels. The passenger side is rusty too, but still solid. If you see any cracks in the body caulk from the fenders, make sure the inside doesn’t look like this:
The CSX: October 14, 2003
by Russ Knize on Oct.14, 2003, under CSX
Well, I spent much of the summer working on house and yard related things, so the Daytona sat for a long time. As such, the CSX has been my daily driver all summer and probably will be all fall. On the upside, some of that work included running 60A service out to my garage, which allows me to power my recently aquired compressor and stick welder. Hopefully I can get the Daytona back together in time to get the CSX back in the garage before winter.
On a whole, the CSX has held up well. There seems to be a coolant leak coming from the radiator. The radiator has desperately needed recoring since I got the car. I have also been using a custom calibration in place of the ND Performance cal I had before. It is much improved, though still has idle issues. The ND cal would always die two or three times at cold startup, but would eventually get going. It also would break up real bad around 5000rpm and had a part throttle lean spot around 10psi of boost that would cause the engine to cut-out. Aside from the idle problem (which may be mechanical), the new cal has none of these problems. It seems that I have the mixture setup right, but we shall see how my gas mileage is. See my Automotive Electronics pages for more info.
The Daytona: October 14, 2003
by Russ Knize on Oct.14, 2003, under Daytona
Well, the car has pretty much been sitting all summer. I spent most of it working on the house and yard, but I do now have 60A service to the garage. I also have a compressor and a stick welder. I just hope I get the paint on the car before the weather turns cold. I have a heater, but I don’t dare use it while painting.
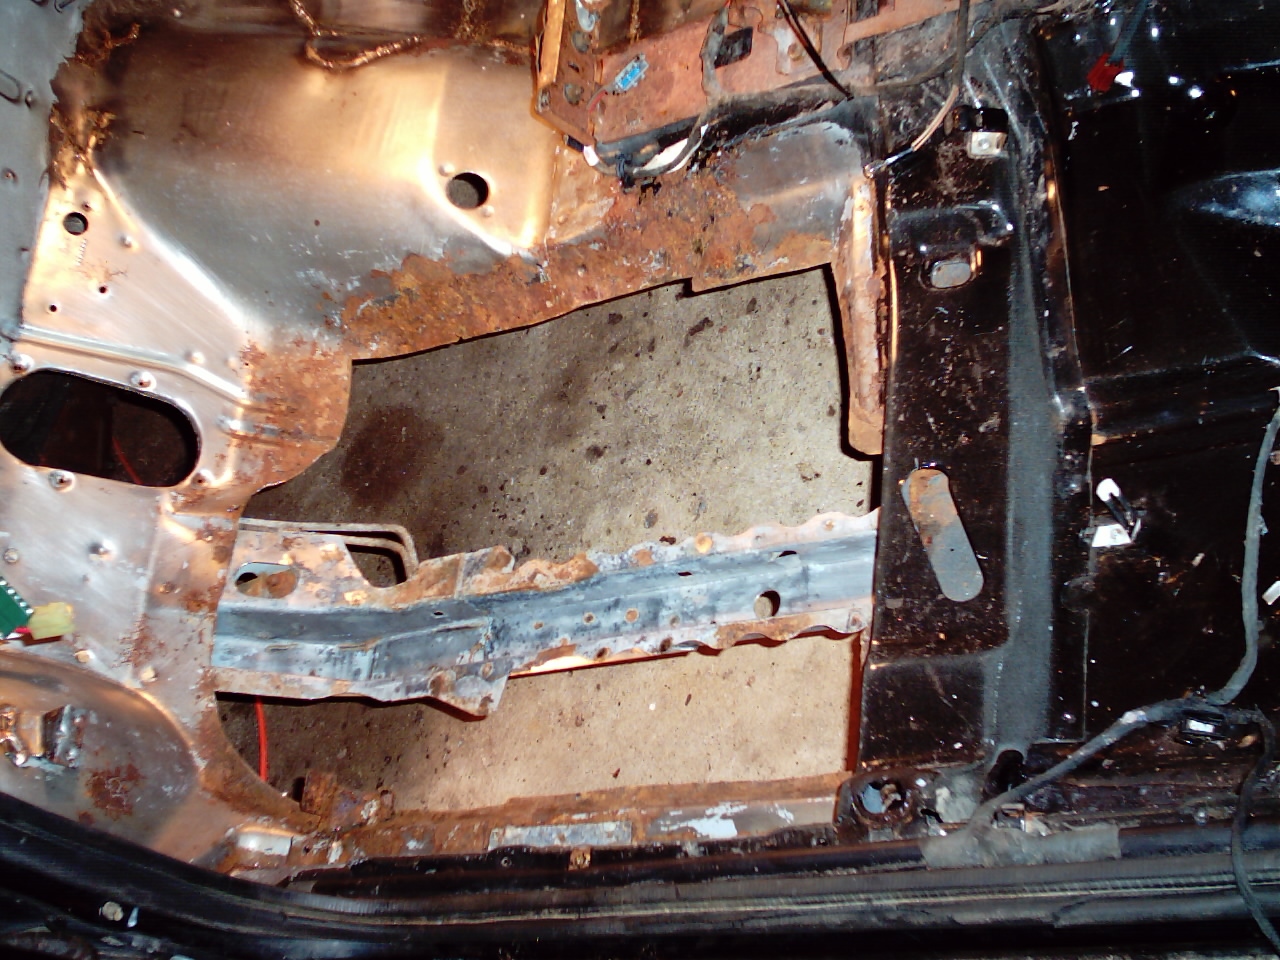
I started getting serious with the floorpans a few weeks ago, but then work sent me out of the country for two weeks. I now have all the rotted sheetmetal out of the passenger side (ended up being most of it). The damage from the previous owner’s incident with the pothole is quite extensive. Much of the floorpan and firewall on that side is buckled and cracked, which is what caused it to rot out. The frame rail was pushed up and outwards, but remained completely rust-free. Apparently, the impact to the front of the K-frame, caused the K-frame to “pivot” on its front mount and mash the rear mount up and back. Quite franky, the car isn’t worth fixing, but it is too late for that now. I managed to push the frame rail back down and over somewhat. The position of the rear K-frame mount still isn’t right, but I think it is closer to where it should be. I bent some really huge 2″ angle iron and plate steel trying to straighten the thing out. I will compensate by shimming down the K-frame on that mount and hogging-out the stud hole to give me more freedom. Hopefully it will be enough. The right-front K-frame mount is squashed and only partially connected to the frame rail, but it is accessible enough to fix. Right now, I am stripping the paint off of the remainder of the floorpan and rail so that I can paint everything with POR-15. The last thing I want is to have all this work rust-out on me. If the car still shakes under acceleration after all this, I will be really pissed.
The Daytona: May 30, 2003
by Russ Knize on May.30, 2003, under Daytona
I got the rear brakes put back together, finally. I originally took them apart to try to fix a squealing problem back there. I believe it was due to a broken spring on one of the brake shoes. I also wanted to bleed the brake system and flush it out with new fluid. Even though the brakes and lines are suprisingly unrusty, the bleeder on the left side snapped off. After breaking an extractor trying to get it out, I just replaced the cylinders on both sides (less than $10 each :). Of course, the flare nuts were frozen to the brake lines (which weren’t even rusty), but I was able to spin the cylinder off the nut. On the right side, the grease around outer bearing was contaminated with water and grit and the spindle nut was even rusty. The dust cap seems OK, so I just flushed out all the grease with gasoline and repacked the bearings. The races looked fine, so I didn’t bother replacing anything. Some new brake hardware and grease seals later, it was all back together.
I always like to get into everything on a new (ha!) car to get a handle on where things are. The shoes themselves seemed new and I know the front pads are new, so I should be good in the brake department. Another thing that I thought was odd was that the emergency brake cables are NOT frozen! The car is an automatic, so I doubt they were ever used. For whatever reason, these cables are plastic-coated. All of the ’87 Daytonas and Shadows I’ve seen were just steel and would rust within a year or two, while my ’88 had the coating. This car gets weirder and weirder.
The Daytona: May 27, 2003
by Russ Knize on May.27, 2003, under Daytona
I think I have decided what paints I am going to use. In the interest of not having to worry about rusting under the primer, I will take the body down to metal, spray with POR-15 clear, POR-15 tie-coat primer, and PPG color and clear coats. The underbody and fenders will get the POR-15 underbody treatment in semigloss black. That should intomb the metal for all eternity. I also need to think about how I am going to weld in the plates to patch up the underbody and straighten-out the front end. At the moment, the driver’s side door is partially stripped and the rear end is in the air so that I can investigate the squeaky brakes and bleed the lines. As usual, the bleeders snapped off when I tried to remove them, so hopefully I will be able to extract them. If not, new cylinders are only $15.
The CSX: May 23, 2003
by Russ Knize on May.23, 2003, under CSX
I’ve been driving the Shelby daily now for several weeks while I addressed some issues with the Daytona. All and all it has been reliable, though still has some cold startup issues, uses oil, and sounds like a Mack truck. I may drop the old Shadow engine in if looks like the Daytona project is going to take a long time. Eventually I put the Daytona wheels on because they actually have tread and they are also round. There are various things that need fixing on the CSX as well, but much of the work is the body. If all goes as planned, I will have a compressor fairly soon and will gain some experience at painting the Daytona. Then I’ll be able to repaint the Shelby, finally. I may try to polish the rims next winter to have a nice, fresh Shelby by next summer. Yeah right. :p
Disclaimer: The projects described in these web pages may use dangerous materials, and components. This material is intended for advanced electronics experimenters only and may cause your vehicle to be suitable for off-road use only. The author assumes no liability for damages incurred through the use or misuse of the information provided herein. This information is provided "as is" and without warranties as to performance of or any other warranties whether expressed or implied. No warranty of fitness for a particular purpose is offered.